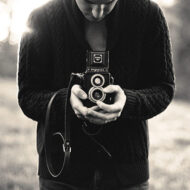
Photographing Artwork
Photographing artwork seems simple enough, right? Point your camera or smart phone at your artwork and take the shot. In truth, how well you do it can make or break your post. Or worse yet, a sale.
I see dozens of posts every day with terrible images of artwork. To be brutally honest, I don’t even stop scrolling for them. Do you?
Photographing artwork to impress
If you care enough to post your artwork, you should care enough to do it right and make a good impression. Even if you’re still a beginner. Think about it. It’s not like a poor quality photo is going to improve your artwork. Rather, a poor image will only highlight the artist’s amateur status.
Great photos of your artwork consists of three simple points.
-
Make sure your artwork is clean and free of smudges.
This was drilled into us in art school and it’s kind of common sense. Would you turn in your project, or report, or resume with smudges or coffee stains? Enough said.

This bright light created a bright area on the cat’s head and washed it out along with a dark area at the bottom edge of the drawing. (Art Credit: Myra Naito)
-
Proper lighting.
Photographing artwork well absolutely requires proper lighting. Lighting that’s too bright washes out the artwork. Details and values (among other things) get lost in the glare.

The image on the left was taken with the overhead light in my room. The one on the right was taken with a LumeCube light. (Art Credit: Myra Naito)
Dim lighting (typical for any home) doesn’t do you any favors either. Standard home lighting usually makes artwork appear yellow and dull. It’s worth spending a small amount of cash on a light specifically for this purpose. Or, the zero budget way is to use sunlight.

Make sure your camera is pointed directly at your artwork to avoid distracting distortions. (Photo Credit: Vector image of photographer – 123RF.com, Easel and degree markings – Myra Naito)
-
Make sure your artwork is flat and well cropped in the frame of the photo.
It’s super distracting when artwork is crooked in the image, or appears to be leaning away from the camera. Make sure your camera is pointed directly at the surface of the artwork.

From left to right: 1) Too much background clutter and a portion of a sketch showing on top is distracting. 2) Artwork is bowed and distorts the image. 3) Image is straight and cropped well. 4) Eliminating the edges of the paper altogether is also acceptable and rather dramatic. (Art Credit: Myra Naito)
Worse yet, if the image is bowed because it’s not on a flat surface, your artwork is going to appear distorted. And, cropping the image well eliminates distracting backgrounds. Ideally, you shouldn’t be able to see any background, only the artwork. The only exception to having other items in the photo with your artwork might be the pens or pencils you used to draw it placed neatly next to your artwork. This showed up with social media and if done tastefully, can look nice.
Trust me…I get it. I’ve been guilty of a few bad images of my own artwork. You’re anxious to post and just get the image online. But you’re not doing yourself any favors by taking bad images. Photographing artwork well should be just as important as creating the artwork itself. After all, you spent time you’ll never get back working on your drawing/painting.
Why throw all that hard work away by taking a bad photo of it?
Lighting:
.
.
.
This blog contains Amazon Affiliate links. As an Amazon Associate, I may earn from qualifying purchases.

Recent Comments